-
- Contact Us
- Privacy Policy
- term and condition
- Cookies policy

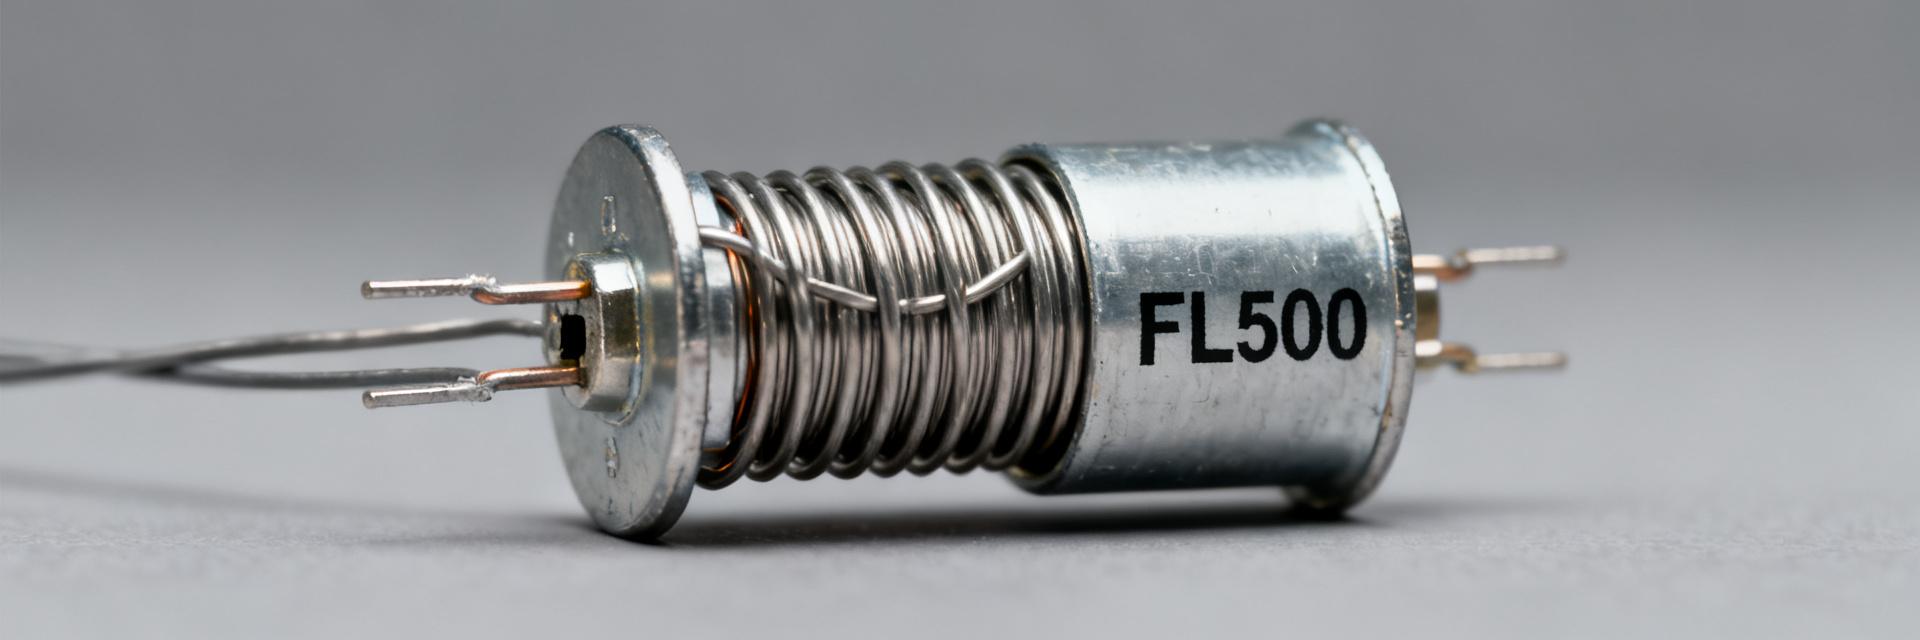
ULH 120 750 J FL=500 power resistor: Datasheet Deep Dive
A professional technical analysis for power electronics designers and engineers.
Rated 120 W continuous with 750 J pulse energy and FL=500 flying leads — what does that mean in practice? This datasheet deep dive translates those headline numbers into selection, mounting and test actions for power electronics. Recommended reading time: ~6–8 minutes. Target audience: power electronics designers, test engineers and procurement professionals who must size, verify and deploy a high-energy wirewound resistor safely. The goal is a line‑by‑line, application‑focused interpretation of the datasheet so engineers can act with confidence.
1 — Quick overview & top-line specs (background introduction)
Key electrical ratings to highlight
Point: Extract the essential electrical ratings first so you can filter candidates quickly. Evidence: Nominal continuous power 120 W; pulse energy rating 750 J; resistance tolerance example J = 5%; lead style indicated by code FL=500 (flying leads 500 mm). Explanation: these three figures (continuous power, pulse energy, and lead style) determine whether the part meets thermal, transient and mechanical constraints for your subsystem.
| Parameter | Typical Value / Note |
|---|---|
| Continuous power | 120 W (at reference ambient) |
| Pulse energy | 750 J (single pulse safe energy) |
| Resistance & tolerance | Range per code; tolerance J = 5% |
| Lead style | FL=500 → flying leads, 500 mm |
| Package | Metal-clad, wirewound |
Mechanical form factor & connectors
Point: The package is a metal-clad wirewound with long flying leads by code. Evidence: FL=500 denotes 500 mm insulated leads suitable for remote mounting. Explanation: use the flying leads to place the resistor away from sensitive components or to connect to busbars; verify the datasheet dimension diagram for mounting hole positions and clearance so thermal path and strain relief are correct. Suggested alt text for dimension diagram: "ULH 120 750 J FL=500 dimensions diagram".
2 — Electrical performance deep-dive: continuous, pulse & overload behavior (data analysis)
Continuous power, derating & ambient dependency
Point: Continuous rating must be derated with ambient temperature and mounting. Evidence: rated 120 W at the datasheet reference temperature (often 40°C). Explanation: if the datasheet provides a linear derating, read power vs. ambient curve; if not, apply a conservative derating rule. Example calculation: assuming a derating of 1% per °C above 40°C, at 60°C ambient allowable power ≈ 120 W × (1 − 0.20) = 96 W. Action: replicate the datasheet derating curve and use the conservative example when the manufacturer curve is unavailable.
Pulse energy, surge handling & safe operating area
Point: Pulse energy (750 J) governs single‑event heating and safe repetition rate. Evidence: datasheet pulse rating normally specifies energy per pulse and recommended repetition limits. Explanation: convert pulse energy to temperature rise by assuming a thermal mass and specific heat for the hot spot. Worked example: assume thermal mass m = 0.05 kg and c = 450 J/kg·K → ΔT ≈ 750 J / (0.05×450) ≈ 33°C. Apply a 20–30% safety margin: design for ≤25°C rise per pulse and allow cooling interval per datasheet repetition guidance.
3 — Thermal management, mounting & derating practices (method guide / data analysis)
Thermal resistance, heatsinking and mounting best practices
Point: Minimize thermal resistance from hotspot to ambient to sustain continuous power. Evidence: datasheet may list Rth or provide power vs. temperature curves; if not, approximate using measured derating. Explanation: recommended mounting: flat, clean metal surface; use thin, high‑conductivity thermal interface compound if permitted; torque screws to specified range and use star washers for electrical and mechanical security. Mounting checklist below ensures repeatability.
- Surface flatness: ≤0.1 mm over contact area.
- Thermal compound: thin, electrically insulating if required.
- Screw torque: follow datasheet—typ. 1.5–2.5 N·m for M4 fasteners (verify part drawing).
- Isolation: use mica or thermal pads when electrical isolation is needed.
Environmental limits & reliability considerations
Point: Environmental stress shortens life if not addressed. Evidence: datasheet lists operating temperature, humidity and vibration limits. Explanation: for harsh environments, apply additional derating (e.g., 10–30% power reduction), and mandate pre-deployment thermal cycling and vibration acceptance tests. Track failures like corrosion, lead fatigue and insulation breakdown.
4 — Application scenarios & selection checklist (case-focused + method)
Typical use cases and why this resistor fits
Point: Match resistor specs to application energy/time profile. Evidence: common applications include dynamic braking, load banks, inrush limiting and test stands where high single‑pulse energy and moderate continuous dissipation are required. Explanation: for dynamic braking prioritize pulse energy and peak voltage; for continuous load banks prioritize steady power and heatsinking. Use safety margins (20–30%) on pulse energy and continuous power when mapping to application.
Substitution rules and equivalent selection guidance
Point: Know which parameters are non‑negotiable when substituting. Evidence: pulse energy, peak voltage and lead style typically cannot be compromised. Explanation: tolerance or physical size can sometimes trade off; when in doubt choose higher pulse energy and at least equal continuous power, or parallel multiple resistors ensuring equal current sharing and consider added ESR and inductance effects. Procurement checklist: required power & pulse, lead length FL=500, clearance and required certifications.
5 — Installation, verification testing & maintenance checklist (action recommendations)
Pre-installation and on-bench validation tests
Point: Verify each unit on receipt before integration. Evidence: datasheet test recommendations usually include insulation resistance and resistance tolerance measurements. Explanation: standard checks: visual inspection, megohm insulation test if applicable, DC resistance measured at controlled temperature, and one or two low‑energy pulses while monitoring temperature with a thermocouple on the metal case and an oscilloscope to verify pulse waveform. Pass/fail: resistance within tolerance; temperature rise per pulse within expected range (allowing safety margin).
Long-term maintenance, monitoring and failure modes
Point: Implement periodic checks to catch degradation early. Evidence: common failure modes are overheating, lead fatigue and corrosion. Explanation: monitoring plan: monthly visual inspection, quarterly electrical check (resistance drift), annual thermal imaging under nominal load. Replace after significant resistance drift (>5% for J tolerance) or any overload event that produced abnormal temperature excursions.
Summary (Actionable Takeaways)
This practical, datasheet‑driven guide helps engineers select, mount and test the ULH 120 750 J FL=500 power resistor by translating specs into repeatable engineering actions.
- Derating matters: recalculate continuous allowable power for your ambient and mounting to avoid overstress and shortened life.
- Pulse planning: convert 750 J pulses into expected temperature rise with conservative thermal mass assumptions and include a 20–30% safety margin for repeat events.
- Mounting & testing: follow a torque/flatness checklist, validate units with low‑energy pulses and thermocouple monitoring, and log results for traceability.
Call to action: download the datasheet, run the worked examples provided here, and use the checklists before installation.
FAQ
How should I verify a new unit from the datasheet on the bench?
Run a visual inspection, measure DC resistance at controlled temperature, perform an insulation check if required, then apply one or two low‑energy pulses while monitoring case temperature with a thermocouple and pulse shape with an oscilloscope. Use pass/fail thresholds: resistance within tolerance, and temperature rise per pulse within expected datasheet or calculated limits.
What is a safe repetition rate for 750 J pulses?
Datasheets often limit repetition based on cooling; if unspecified, assume conservative duty: single or very low repetition (e.g., one pulse per minute) until verified by temperature testing. Measure cooling curve after a representative pulse and establish the interval that returns the part to near‑baseline temperature before the next event.
When should I replace the resistor in service?
Replace after any overload event that causes abnormal temperature excursions, or if resistance drifts beyond tolerance (example: >5% for J tolerance). Also replace on signs of mechanical damage, lead fatigue, corrosion, or after a specified number of thermal cycles if defined by your reliability plan.
-
 ULV Resistor Thermal Report: Datasheet Deep Dive Quick Guide2026-05-17 10:13:22 0Point: Recent product surveys show a clear migration toward higher power density and compact packages in braking and load-bank designs, increasing thermal risk for compact components. Evidence: Industry sampling indicates a double-digit rise in designs using compact ULV form-factors. Explanation: This guide helps engineers read a ULV resistor datasheet, extract critical thermal specs, and convert those values into reliable design decisions. Scope: Practical interpretation of datasheet entries, defining repeatable test protocols for prototype sign-off. ULV Resistor at a Glance: Design, Use Cases, and Why Thermal Matters What makes ULV resistors distinct Point: ULV resistors combine compact envelopes with relatively high dissipation per unit volume. Evidence: Typical construction uses a metal-clad housing and chassis-mount flange establishing the primary heat path. Explanation: Chassis conduction is the dominant cooling route; designers must prioritize mounting behavior. Key thermal failure modes Point: Several measurable failure modes recur in field returns. Evidence: Hotspots, exceeded insulation class, and terminal derating are common root causes. Explanation: Exceeding 120–150°C case limits or solder ratings shortens life and raises safety risk. How Thermal Specs Appear on a ULV Resistor Datasheet Typical thermal spec items and what they mean Point: Datasheets list rated power (on-chassis vs free air), thermal resistance (°C/W), and pulse energy specs. Evidence: Each entry carries reference conditions—mounting area or air movement. Explanation: Confirm units; listed thermal resistance usually maps case-to-ambient or case-to-chassis. Red flags and ambiguous entries Point: Ambiguity undermines safe design. Evidence: Vague “operating temperature range” without test conditions is a red flag. Explanation: Always ask: was power measured on a defined heat-sink? If airspeed is missing, lab characterization is mandatory. Repeatable Thermal Test Methods Test Type Protocol Highlights Steady-State Mount on intended chassis, stabilize ambient ±1°C, use K-type thermocouples. Wait for equilibrium ( Pulsed & Transient Define pulse shape (J) and duty cycle. Use high-speed data loggers to derive thermal time constant τ. Interpreting Steady-State vs Pulsed Charts Worked Example: Power vs. Temperature Rise Example: 140 W On-Chassis (Rth 0.5°C/W) vs 100 W Free-Air (Rth 0.9°C/W). On-Chassis: 70°C Rise Free-Air: 90°C Rise Explanation: At 40°C ambient, On-Chassis case ≈ 110°C; Free-Air case ≈ 130°C. This helps check insulation class limits. Pulse Energy (E = C·ΔT): Short pulses (t Practical Examples & Common Pitfalls Example A: Continuous Braking 120 W with 0.6°C/W = 72°C rise. At 35°C ambient, case ≈107°C. Acceptable if insulation class ≥130°C. Common Pitfall Designers often use free-air ratings for chassis-mounted parts or confuse pulse vs steady ratings. Validate with lab tests. Engineer’s Quick Selection & Verification Checklist Pre-selection Checklist ✅ Confirm rated power (Chassis vs Free Air) ✅ Check Thermal Resistance (°C/W) ✅ Max Case/Terminal temperatures ✅ Verify Pulse Specs vs Energy (J) Field Verification Plan 📋 Instrumentation: K-type TCs & Calibrated IR 📋 Pass/Fail: Case temp 📋 Archive TC locations and timestamps Summary Point: Align datasheet thermal specs to real mounting and duty conditions. Evidence: Matching °C/W, derating curves, and time-constant behavior prevents surprises. Call to Action: Use the checklist and test plan to reduce thermal risk before prototype sign-off; validate ambiguous entries experimentally. Extract and confirm thermal specs—rated power reference and thermal resistance. Use steady-state and pulse test protocols with calibrated TCs. Compute pulse allowance from time-constant or E = C·ΔT formula. Frequently Asked Questions How should an engineer interpret ULV resistor pulse ratings? Answer: Convert pulse specs to a common energy metric (Joules). If durations or voltage/current are specified, perform a fixed-energy pulse test to confirm temperature rise if conditions differ from the datasheet. What is the best way to convert thermal resistance into case temperature? Answer: Use ΔT = P × Rth. Multiply power by thermal resistance to get the temperature rise, then add your ambient temperature to find the final case temperature. When is laboratory verification mandatory? Answer: Mandatory whenever datasheet conditions (mounting area, airspeed) differ from your real profile. Run tests replicating real use to establish pass/fail criteria before production sign-off. ULV Resistor Thermal Report - Technical Engineering GuideREAD MORE
 -
 ULV 500 Datasheet Deep Dive: Specs & Thermal Ratings2026-05-16 10:15:21 0A professional engineering guide to power resistor selection, derating analysis, and laboratory verification. Engineers selecting power resistors must decode rated power, derating behavior, and mounting conditions to avoid thermal failure. Typical ULV 500-class datasheet entries often show up to 500 W on a specified heatsink but nearer 300 W in free air; common derating reduces allowable continuous power as ambient or case temperature rises. This deep dive explains how to read a ULV 500 datasheet, interpret thermal ratings and specs, and perform practical lab verification. The goal is practical clarity: identify the datasheet fields that drive selection, translate derating curves into allowable power calculations, and outline test procedures to confirm real-world performance. Engineers working with a specific part such as ULV 500 N 80 J should replace illustrative numbers with the exact datasheet points when applying the worked examples and templates below. ULV 500 datasheet — at-a-glance spec summary (Background introduction) Key specs table to include and how to format it An engineer-friendly single-column table should list fields and short test-condition notes so reviewers immediately see assumptions. Field Value / Notes Rated power (heatsink) e.g., 500 W — specify heatsink condition Rated power (free air) e.g., 300 W — natural convection, no heatsink Rated ambient e.g., 25°C — replace with datasheet value Derating curve Reference figure and axis labels Resistance / tolerance Ohms, ±% TCR ppm/°C Max case temp °C Surge rating X×rated power for Y seconds Mounting / torque Recommended torque and interface notes Thermal resistance °C/W if provided What to read first on any ULV 500 datasheet Follow a checklist: locate the published power ratings and confirm whether they apply to heatsink or free-air; find the derating graph and note axes (ambient or case temperature); read mounting instructions and torque; and capture test conditions (airflow, heatsink contact). Watch ambiguous terms like "power dissipation" versus "power rating" — always map labels to the datasheet's stated test setup before using numbers in calculations. Thermal ratings & derating curves explained (Data analysis) How to interpret a derating curve (axes, breakpoints, and calculations) Derating curves typically plot allowable percent-of-rated-power versus ambient or case temperature. If a curve shows 80% allowable power at 45°C, allowable_power = rated_power × 0.80. Example: Rated Power: 500 W Derating @ 45°C: 0.80 Allowable: 400 W ILLUSTRATIVE DERATING TREND 25°C Temp °C 100% Mounting, heatsink interface and ambient airflow impacts Heatsink-mounted ratings assume a thermal path: resistor → case → heatsink → ambient. Free-air ratings assume natural convection and a different thermal limit. Factors that change thermal performance include heatsink thermal resistance (°C/W), mounting torque, quality of thermal interface material (TIM), and forced convection (CFM). Verify the datasheet's stated heatsink conditions before applying its rated power to your design. Electrical & mechanical specs deep-dive (Data analysis / specs) Electrical parameters engineers must verify Key electrical items: resistance range and units, tolerance (convert to worst-case resistance = nominal × (1 ± tolerance)), TCR in ppm/°C (impact on precision across temperature), rated voltage/insulation, and surge/pulse capability (e.g., X×rated_power for Y seconds). Where noise or inductance is noted, include that in system-level transient and EMI analysis. Always compute worst-case I²R and resulting power for thermal checks. Mechanical & thermal limits to watch (case temp, mounting, environmental) Verify maximum case temperature and whether derating curves reference case or ambient. Confirm recommended mounting torque and assembly notes to ensure good thermal contact. Check vibration and shock ratings if applicable, IP or environmental classifications, and clearance/creep distances for high-voltage applications. Red flags include missing torque spec, absent derating curve, or unspecified test fixtures. How to measure and verify thermal performance in the lab (Method guide) Test setup & measurement checklist Mount: Use datasheet torque + recommended TIM on specified heatsink. Load: Apply known steady load. Instrument: Calibrated thermocouples on case, heatsink base, and ambient sensor. Environment: Record airflow (CFM) and use thermal imaging for hotspots. Interpreting test results and comparing to datasheet ratings Map measured case or heatsink temperature to the derating curve axis to determine allowable power. A large ΔT between case and heatsink indicates poor contact or inadequate TIM. Acceptance example: measured case temp ≤ datasheet max case temp under the test power. If measurements exceed limits, increase TIM quality, torque, airflow, or choose a higher-rated part. Selection checklist, derating examples & installation tips (Actionable) Quick selection workflow Define ambient & airflow. Select power with margin. Consult heatsink vs free-air rating. Apply derating factor. Verify surge/fit. Run lab verification. Installation Tips Heatsink surface: Flat & clean. Use recommended torque. Avoid stress on leads. Provide airflow channels. Check TIM coverage. Summary This review showed where to find critical entries on a ULV 500 datasheet and how to translate derating curves into allowable power for real operating ambients. Engineers should cross-check rated heatsink vs free-air numbers, confirm test conditions, verify electrical worst-case resistance and surge capability, and validate thermal performance with controlled lab measurements before field deployment. Identify the rated heatsink and free-air power in the ULV 500 datasheet and note the exact test conditions. Use the derating curve: allowable = rated_power × derating_factor. Verify mounting torque, TIM quality, and airflow; measured case temperature must be ≤ datasheet max. Additional SEO & editorial guidance How does ULV 500 N 80 J differ in mounting assumptions? Mounting assumptions vary by datasheet: some parts specify heatsink base temperature, others give free-air ratings. For the ULV 500 N 80 J example, confirm whether the published 500 W rating assumes a heatsink base held at a specific temperature; if not stated, treat the heatsink rating cautiously and validate in the lab under the actual mounting conditions. What practical checks confirm a datasheet's thermal ratings? Perform steady-state tests at the specified ambient and airflow, measure case and heatsink temperatures with calibrated sensors, and compare to the derating curve axis. Check for a small ΔT between case and heatsink — large ΔT indicates poor contact. Document test conditions so the datasheet comparison is apples-to-apples. When should designers derate further beyond the datasheet? Derate further when the application has restricted airflow, higher-than-specified ambient, contaminated environments, or thermal cycling that degrades contact over time. Add safety margin for mission-critical systems and verify with accelerated thermal tests when reliability or long service life is required.READ MORE
 -
 ULV800 power resistor: Performance Report & Thermal Guide2026-05-14 10:15:19 0Point: Datasheets and field tests reveal a recurring performance gap between chassis ratings and real-world continuous capability. Evidence: Typical 800W chassis-rated devices often sustain only ~300–400W in free-air, with surface temperatures rising 40–80°C above ambient. Explanation: This delta makes thermal sizing, mounting, and documented test conditions the decisive factors for reliable operation of ULV-class resistors. 1 — Background & Specification Snapshot 1.1 — Construction and Ratings Point: ULV devices are commonly metal-clad, wire-wound elements in vented vertical housings designed for chassis or heat-sink mounting. Evidence: Typical units list chassis/heat-sink power (800W nominal), free-air continuous power (~300–400W), and short-pulse energy ratings (Joules). Explanation: Engineers must treat the 800W nameplate as a condition-dependent number and verify mounting style and insulation/voltage limits. 1.2 — Critical Datasheet Entries Point: Critical entries are power rating, short-overload specs, Rth, max case temp, and derating curves. Evidence: For example, an Rth_case-to-ambient of 0.12°C/W implies a 100W load produces 12°C rise (ΔT = P × Rth). Explanation: Reading entries in context—mounting assumptions and airflow—prevents overestimating in-situ power. 2 — Electrical Performance Metrics & Bench-Test 2.1 — Steady-state resistance behavior and tolerances Parameter Value/Example Impact TCR Shift 0.1%/°C on 1.00Ω +0.5% at 5°C rise Power Calc 10A Current 100W heating at 1.00Ω Point: Resistance shifts with temperature via TCR and tolerance affect power sharing and control-loop stability. Explanation: Use predicted ΔT from Rth to estimate resistance drift and re-evaluate system sensing accuracy. 2.2 — Transient and pulse handling Point: Pulse capability is governed by energy (Joules) and thermal mass rather than steady-state wattage. Evidence: A 2 J pulse delivered in 10 ms may be tolerated many times, but a 200 J event requires duty-cycle cooling; pulse rating charts convert Joules to allowable surge. Explanation: Validate pulse-width vs energy graphs on the datasheet with lab energy dumps and record peak case temperatures to ensure margins. 3 — Thermal Characteristics & Derating 3.1 — Interpreting Rth and derating curves Thermal Equation in Practice: ΔT (37.5°C) = Power (250W) × Rth_c-a (0.15°C/W) Evidence: If max case temp is 150°C and ambient is 40°C, the margin is 72.5°C. Explanation: Use P × Rth to predict steady-state case temperature and apply the derating curve to select a conservative operating point. 3.2 — Common thermal failure modes and warning signs Point: Failures stem from hotspots, thermal runaway, insulation breakdown, and mechanical fatigue. Warning Signs: Surface temps >120–140°C, resistance drift >2–5%, discoloration, or increased leakage. Explanation: Establish alarm thresholds and periodic inspection for these signs to prevent catastrophic insulation or mounting failures. 4 — Mounting & Cooling Best Practices 4.1 — Chassis attachment: Mechanical and thermal joint quality dominates case-to-sink Rth. Poorly mated surfaces add 0.05–0.2°C/W. Action: Follow flatness/torque checklists. 4.2 — Forced-air: Can restore chassis rating. Evidence: Target 100–200 CFM or velocity >2 m/s; this raises usable power by 20–50%. 5 — Test & Validation Protocol 5.1 — Lab sequence: Verify performance under controlled variables: cold R measurement, stepped power increases, and steady-state recordings. 5.2 — Acceptance: Case temp below max, drift Explanation: Document ambient and mounting for traceability. 6 — REAL-WORLD CASE STUDY: BRAKING/LOAD-DUMP 6.1 — System Context: 5 kJ per event, average duty cycle 5%, ambient 50°C. Initial selection used chassis ratings but predicted needed cooling upgrades for repetitive events. 6.2 — Measured Outcomes: Predicted continuous 400W reduced to measured 260W free-air; retrofit of heat-spreader plus 150 CFM fan raised sustained capability to ~380W. Lesson: Simple conduction/forced-air recovered most power. 7 — Selection & Troubleshooting 7.1 — Quick Selection Checklist Continuous power required Pulse energy (J) Ambient range Mounting style (Rth target) Derating: Specify 20–40% against nominal for free-air. 7.2 — Maintenance Playbook Verify torque and flatness, measure case temp under load, log resistance drift. Schedule: Thermography and torque re-checks quarterly for high-cycle units. Summary Point: Correct interpretation of Rth and derating curves determines usable power. Evidence: Chassis-rated 800W parts often deliver 30–50% less in free-air. Explanation: Run the selection checklist, perform validation protocol, and adopt periodic thermography to ensure real-world performance. Key Takeaways Interpret Rth: Apply P × Rth (e.g., 250W × 0.15°C/W → 37.5°C rise) when sizing ULV 800 13 J FL=1500 parts. Prioritize Mounting: Poor contact can cut usable continuous power by tens of percent. Validate: Use stepped-load lab protocols under worst-case ambient and airflow. Frequently Asked Questions How should an engineer interpret ULV800 power resistor free-air vs heat-sink power? Treat them as separate use cases. A 800W chassis rating corresponds to ~300–400W free-air. Select the lower, condition-specific power unless datasheet conditions are verified in lab tests. What thermal checks are required when installing an ULV800 power resistor? Check flatness and torque, apply appropriate TIM, and run a stepped-load test while logging case thermocouples and ambient to correlate with published ratings. When is forced-air mandatory for ULV800 deployments? Mandatory when continuous power needs exceed free-air capability (>~400W). Targeted airflow of 100–200 CFM is typically required to keep case temp ≥20–30°C below max. What is the recommended documentation to accompany ULV800 test reports? Include ambient, surface flatness, TIM type, fastener torque, airflow, and raw logged data. Complete traceability allows others to reproduce conditions and explains field result discrepancies. ULV800 Engineering Resource | Performance Report & Thermal GuideREAD MORE
 -
 ULV1000 resistor: Latest Thermal Data & Derating Guide2026-05-13 10:24:19 0Thermal Engineering High Power Component Field and datasheet test points indicate continuous case-limited ratings approaching 500 W at a specified reference case temperature; transient pulses can exceed that by several times but demand strict cooling and duty-cycle limits. This data-driven hook frames why precise thermal data and derating practice are decisive for ULV1000 resistor reliability and overall system safety. The purpose of this guide is to synthesize current thermal data, clarify derating practice, and provide actionable measurement and installation guidance engineers can apply when designing with this family. It focuses on thermal data interpretation, test methods, and practical derating rules for robust system integration. Background: ULV1000 resistor — key specs & thermal basics What the ULV1000 resistor is designed for Point: The ULV1000 resistor is a high-power metal-clad/wire-wound class typically used in load banks, dynamic braking, and power conversion. Evidence: Manufacturer datasheets and independent lab reports list power classes in the 600–1200 W range with resistance values spanning low-ohm to kilo-ohm classes. Explanation: Construction favors a heavy ceramic case with large terminals for conduction; common mounting styles include chassis bolt-down or through-bushing fixation to support heat transfer and secure mechanical load. Thermal fundamentals relevant to ULV1000 performance Point: Thermal behavior depends on thermal resistance (°C/W), reference case temperature, and heat paths. Evidence: Thermal data in test reports distinguishes case vs. ambient ratings and shows that conduction to the chassis and forced convection dramatically raise continuous power capability. Explanation: Use ΔT/P to estimate °C/W: steady-state depends on airflow and mounting; transient pulses depend on time constant (τ) and heat capacity—test setups often specify a reference case temperature measured at a calibrated thermocouple spot. Data analysis: Latest thermal data, test results & derating curves Conceptual Derating Profile: Power vs. Case Temperature 100% Power 25°C T-ref (Nominal) T-max Note: Actual curve shifts based on mounting substrate and airflow velocity. Interpreting continuous power vs. temperature (derating curves) Point: Derating curves define a constant-power plateau to a reference case temperature, then a linear decline to an ambient cut-off. Evidence: Typical thermal data presents allowed power at reference case temp (e.g., 500 W) and a slope reducing allowed power by a set W/°C to a safe ambient limit. Explanation: Read the curve by locating your expected case temperature under load; choose the intersection to determine safe continuous power. Mounting choices that lower case temperature (heat sink, conductive pad) shift the operating point to higher allowable power. Transient/pulse thermal behavior and time constants Point: Pulse capability depends on energy, pulse width, and the resistor thermal time constant. Evidence: Test pulses show short pulses (milliseconds to seconds) can allow several kJ without exceeding ΔT limits, while cumulative heating reduces headroom for repeated pulses. Explanation: Use the resistor's thermal capacitance and τ to model temperature rise: for a single pulse, allowable energy ≈ C·ΔTmax; for repetitive pulses, ensure sufficient off-time for cooling to avoid thermal runaway. Apply duty limits conservatively for in-enclosure applications. Measurement & validation: how to collect reliable thermal data Recommended test setup & instrumentation Point: Repeatable thermal characterization requires specified sensor placement, controlled ambient, and adequate instrumentation. Evidence: Best practice uses a thin-film thermocouple on the indicated case spot, an IR camera for distribution checks, a stable power source, and a data logger sampling at ≥1 Hz. Explanation: Mount the thermocouple with thermal paste at the reference point called out by the datasheet, control ambient (±1°C), and document airflow. Safety note: start at low power and step up while monitoring temperature trends and chassis conduction paths. Data processing: extracting thermal resistance and validating derating Point: Extract °C/W and validate derating curves from steady-state and transient tests. Evidence: Compute thermal resistance as Rth = ΔT / P after steady-state is reached; for pulses, fit exponential temperature response to obtain τ and effective capacitance. Explanation: Apply a conservative design margin (typical practice: 20–30%) to measured limits when specifying operational power. Record raw logs, photos of setup, and spreadsheet columns for time, voltage, current, case temp, and ambient for qualification traceability. Practical case study: applying thermal data to a system design Design scenario & constraints Point: A realistic constraint example clarifies derating decisions. Evidence: Consider a braking module requiring 400 W bursts inside a sealed enclosure with 40°C ambient and limited airflow; space permits only chassis-mounted resistors. Explanation: Given enclosure heat buildup, designers must assess whether the ULV1000 resistor allowed continuous power at the case reference temperature can sustain the duty cycle, or if additional heat sinking or forced ventilation is mandatory to avoid exceeding thermal limits. Step-by-step derating and final specification Point: Apply the derating curve and pulse rules to derive final spec. Evidence: Read the derating curve: at 40°C and your measured case-to-ambient delta, continuous allowed power drops; add pulse energy allowance per τ and ensure off-time for recovery. Explanation: If the curve indicates allowable continuous power <400 W under current mounting, specify cooling (e.g., 0.5 m/s forced airflow or a conductive pad to chassis) to raise allowable power, or derate the resistor to a conservative continuous rating (e.g., 300 W) with a 25% safety margin and documented pulse limits. Action checklist & installation best practices Category Action Item Recommendation Pre-deployment Datasheet Review Confirm T-ref location and derating slope. Installation Mounting Integrity Use thermal pads and specified torque values. Maintenance Thermal Inspection Periodic IR scans for hotspots or corrosion. Summary Understand primary thermal limits: Start from the datasheet reference case rating and interpret the derating slope to set continuous power limits within your enclosure. Use measured thermal data: Extract °C/W from steady-state and τ from transient tests, then apply a conservative design margin. Apply practical controls: Consider conductive mounting, forced airflow, or reduced duty cycle to meet system requirements. Frequently Asked Questions Q: How should I derate a ULV1000 resistor for elevated ambient temperature? Derating should follow the published curve: determine the case temperature under your mounting and ambient, find the corresponding allowed power, and apply a safety margin (20–30%). If the required power exceeds the derated allowance, add conductive mounting or forced airflow to lower the case temperature before increasing power. Q: What test setup yields reliable ULV1000 resistor thermal data? Use a calibrated thermocouple at the datasheet’s reference point, control ambient, log voltage/current and temperature until steady-state, and capture IR images for hotspot checks. For pulse tests, record pulse width, duty, and temperature recovery to extract τ and allowable pulse energy. Q: What are recommended in-field checks to ensure continued ULV1000 resistor reliability? Perform periodic IR scans under representative load, verify terminal torque and mounting integrity, and compare measured temperatures to expected values. If temps rise over time beyond tolerance, investigate airflow blockage, corrosion, or changes in conduction path and re-qualify with a short thermal test. © Professional Thermal Engineering Series | Reliable High-Power Resistance DesignREAD MORE
 -
 ULV 150 Resistor Deep Report: Thermal Specs & Tests2026-05-12 10:16:20 0Recent lab measurements and published datasheet curves show significant variation in steady-state and transient thermal response for the ULV 150 depending on mounting, cooling method, and pulse profile, which directly affects allowable power and long‑term reliability. This report aims to unpack the ULV 150 thermal specs, describe repeatable test methods, analyze steady and pulsed results, and provide actionable derating rules and validation steps for engineering teams expecting data, figures, and calculation boxes. 1 — Product Overview & Thermal Baseline (Background) Figure 1: ULV 150 Package Orientation and Thermal Interface The overview establishes the baseline electrical and mechanical parameters required before any thermal campaign. Engineers should gather rated power, resistance values, package orientation, case materials, nominal mounting footprint, and the manufacturer’s listed Rth (junction‑to‑ambient and junction‑to‑case) entries. Datasheet thermal specs typically appear in the electrical characteristics table and in separate thermal‑performance charts—prioritize tabulated Rth numbers and derating curves when selecting limits. 1.1 — Key electrical & mechanical specs to know Point: Critical parameters set the starting point for calculations. Evidence: Typical entries include rated power, Rth(j‑a), Rth(j‑c), mass, and mounting footprint. Explanation: For an empirical campaign capture: rated continuous power, package orientation (vertical/vertical‑mounted), case alloy/paint, and listed Rth values. Example checklist: rated power (W), resistance (Ω), mass (g), footprint (mm²), Rth j‑a (°C/W), Rth j‑c (°C/W). 1.2 — Typical failure modes tied to overheating Point: Overtemperature drives common failures. Evidence: Observed modes include gradual resistance drift, solder/joint fatigue, substrate cracking, and catastrophic open circuits. Explanation: Map each failure to thermal metrics—resistance drift correlates with average ΔT over months, solder fatigue with thermal cycling ΔT and ramp rates, and substrate damage with peak transient temperatures. 2 — Steady-State Thermal Data & Analysis (Data Analysis) Steady‑state analysis converts Rth metrics into continuous allowable power at a target ambient. Use datasheet Rth(j‑a) to compute steady ΔT = P × Rth and ensure Tcase (or estimated Tj) stays below material or reliability limits. 2.1 — Interpreting Rth & Derating Curves Point: Rth is the bridge between power and temperature. Evidence: Rth(j‑a) and Rth(j‑c) are given as single numbers or curves. CALCULATION BOX Pmax_cont = (Tlimit_amb_diff) / Rth(j‑a) Example: If allowable ΔT to ambient is 50°C and Rth = 10°C/W then Pmax_cont = 5 W. 2.2 — Empirical steady-state results: mounting, orientation, and airflow effects Mounting ΔT per W (typical) % change vs free‑air Free‑air, vertical 10–15°C/W — Heatsink, bolted 3–7°C/W −50% to −70% Forced convection (1–3 m/s) 5–9°C/W −20% to −40% 3 — Transient & Pulse Thermal Behavior (Data Analysis) 3.1 — Pulse testing methodology and important time scales Point: Select pulses to probe thermal mass and steady average heating. Evidence: Recommended tests: single long pulse (soak), single short pulse (ms–s), repetitive pulses at defined duty. Explanation: Instrumentation: thermocouples on case, high‑speed IR for surface transients, DAQ >= 1 kHz for sub‑second pulses. 3.2 — Converting pulse results to allowable peak power Point: Use measured thermal time constant τ and transient ΔT to compute peak limits. ΔT(t) = ΔT∞(1 − e^(−t/τ)) Evidence: For a known τ, invert to find allowable pulse energy: E_allowed = C × ΔT_allow, where C is effective thermal capacitance; convert to peak power by dividing by pulse width. Watch pitfalls: averaging power underestimates instantaneous junction peaks. 4 — Thermal Test Protocols & Lab Setup (Method / How-to) 4.1 — Test rig checklist & measurement best practices Mounting: specified torque, flatness check, and mechanical isolation. Sensor placement: thermocouple on case center, reference on ambient, IR angle and emissivity calibration. Calibration: DAQ and sensors calibrated to NIST‑traceable references where possible. Power source: low‑noise supply, programmable pulse generator, current/voltage monitoring at >=1 kHz. Environmental control: stabilized ambient ±1°C or record ambient drift. 4.2 — Repeatability, uncertainty estimation, and reporting templates Point: Quantify uncertainty for design confidence. Evidence: Run N≥5 repeat runs for each test point and report mean ± standard deviation. Explanation: Report Rth apparent with confidence intervals, note systematic uncertainties (sensor placement, emissivity). 5 — Comparative Case Study: ULV 150 (Case Study) 5.1 — High-convection industrial drive Point: High airflow preserves margin. Evidence: Assumed ambient 40°C with 2 m/s forced convection gave steady ΔT/W ≈ 6°C/W; a 10 W continuous load yielded case ≈100°C. Decision logic favored minimal heatsinking and standard mounting with 20% derating. 5.2 — Constrained-ventilation telecom enclosure Point: Low airflow forces derating or retrofits. Evidence: With 50%. Tradeoff favored bolt‑on heatsink for long‑life deployments. 6 — Thermal Management Checklist & Engineering Actions 6.1 — Immediate design decisions: derating, mounting, and cooling Derating: Classify cooling into free‑air (50% derate), forced‑air (25%), and heatsink (0-10%). Mounting: Use bolted heatsink with thermal interface; ensure torque and flatness. Quick fixes: Add air baffles or directed fans to improve cooling class. 6.2 — Validation sign-off: tests to run before production Mandatory signoffs: full‑load soak at worst‑case ambient, pulse endurance for expected duty cycles, and thermal cycling per reliability targets. Acceptance: temperatures within spec, drift below threshold. Conclusion / Summary ULV 150 thermal performance depends strongly on mounting, airflow, and pulse profile; accurate interpretation of thermal specs plus properly executed steady‑state and transient tests are essential for safe power allocation and durability. Derating must be tied to measured Rth and cooling class. Transient time constants enable conversion of pulse ΔT into allowable peak power. Repeatability and uncertainty reporting make derating decisions defensible. Common Questions What Rth value should be used from the datasheet when sizing continuous power for the ULV 150? Use the datasheet Rth(j‑a) for free‑air estimates and Rth(j‑c) when a verified heatsink or chassis contact is used. Convert Rth into Pmax_cont by dividing allowable ΔT (Tlimit − Tambient) by Rth. How should pulse test results be converted to allowable peak power for the ULV 150? Extract the thermal time constant τ from transient ΔT(t) data, compute the effective thermal capacitance, then derive peak power based on pulse width and allowable ΔT. Avoid using average power alone. Which tests are mandatory before approving ULV resistor installations for production? Mandatory tests include full‑load soak at worst‑case ambient, representative pulse endurance matching field duty cycles, and thermal cycling for fatigue assessment.READ MORE
- Technical Features of PMIC DC-DC Switching Regulator TPS54202DDCR
- STM32F030K6T6: A High-Performance Core Component for Embedded Systems
- APT50GH120B Datasheet Deep Dive: Specs, Ratings & Curves
- SI3402-B-GMR PoE PD Controller: Market & Specs Report
- SI3402-B-GMR Benchmarks: Real PoE Performance Insights
- EFM8BB21F16G Full Datasheet & Pinout: Specs Summary
- CP2102N-A02-GQFN20R Pinout & Footprint: Quick Data Guide
- SI53307-B-GMR Datasheet & CAD Models: Quick Specs Checklist
- SI53361-B-GMR: Latest Specs, Stock Levels & Price Guide
- SI53340-B-GM: Deep Performance Report & Key Metrics
-
 SI3402-B-GMRSILICON LABS(芯科)
 -
EFM8BB21F16G-C-QFN20RSILICON LABS(芯科)
-
CP2102N-A02-GQFN20RSILICON LABS(芯科)
-
SI53307-B-GMRSILICON LABS(芯科)
-
SI53361-B-GMRSILICON LABS(芯科)
-
SI53340-B-GMSILICON LABS(芯科)
-
SI53306-B-GMRSILICON LABS(芯科)
-
C8051F300-GMRSILICON LABS(芯科)
-
SI4464-B1B-FMRSILICON LABS(芯科)
-
SI5351A-B-GTRSILICON LABS(芯科)


{{ boxName }} ({{ dataList?.length || 0 }} Items)
{{ val.manufacturer || val.en_manufacturer || '' }}
quantity: {{ val.quantity }}
it was empty.